28.4.10

Draped Cardigan Tutorial

I have a favourite cardigan that was looking a bit rough around the edges. It's a very basic design in a light knit jersey. Now that I have my serger I felt I should have a try at making a reproduction. The basic design is a wide strip of stretch knit jersey fabric with raw edges and sleeves set into it. Kinda like a jersey pashmina with arms.

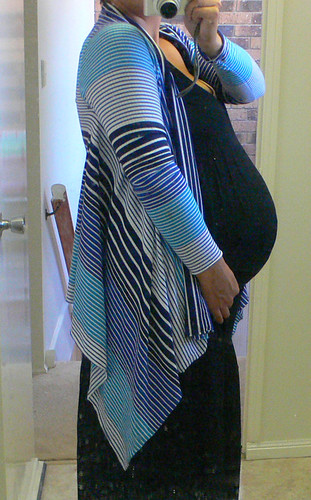
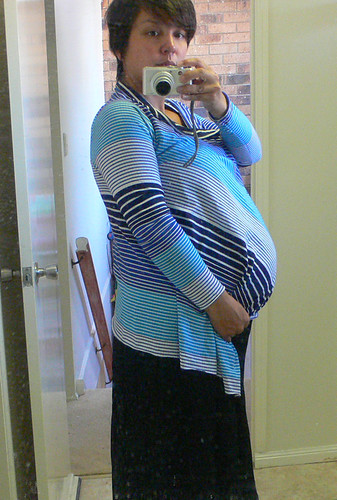
Below is a whole range of photos showing how I like to wear it. Sorry ahead of time for the awful bathroom mirror photos but I really felt like getting this tute done today as it is my due date so who knows when my next post shall be. And aren't thin stripes terrible to photograph? Kind of makes for an optical illusion that hurts the eyes. . .
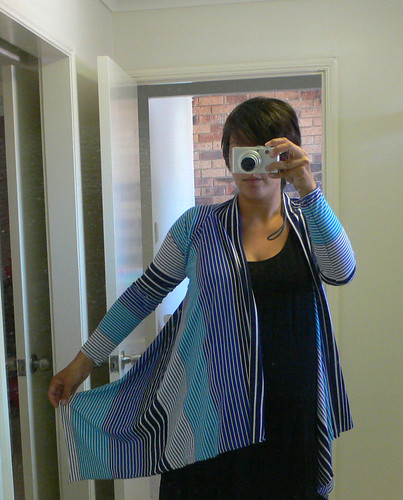
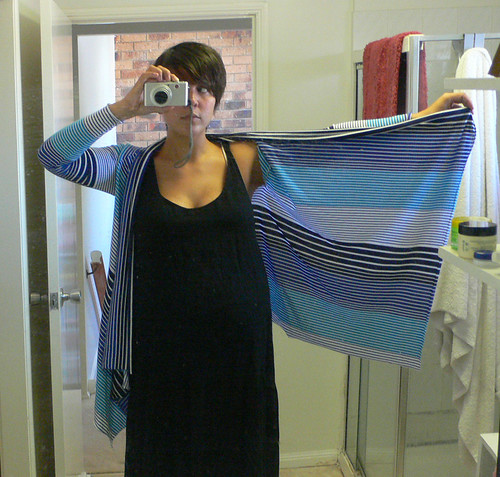
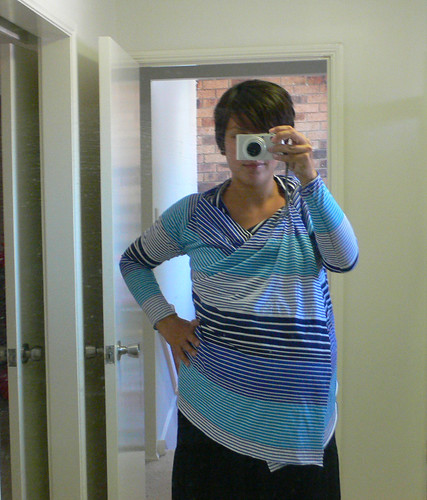
It's the perfect Queensland cardigan because it is so light and versatile. You can just let it drape naturally or you can pin up one or both sides. I often tuck it up and inside the shirt I'm wearing underneath for a sort of scarf-like effect.

Also, it's the perfect pregnancy/breastfeeding cardigan because you can wrap it around your growing belly or around a baby in a carrier or around a nursing babe who is easily distracted by wind or other action in the surrounding environment. I'm not the type to worry about 'hiding' my breastfeeding baby but if that is something that makes you more comfortable about feeding in public, the cardigan makes a nice tent for breastfeeding under.


Here is the pdf tutorial with measurements etc. for making the cardi. It is meant to be custom fit so you will have to do a bit of measuring of yourself. I think it is all fairly self explanatory in the schematics but here is a little breakdown.

1. Measure your armspan and cut a piece of stretch knit jersey to this measurement wide, by half this measurement long. Therefore if your armspan is 160 cm you would cut a piece 160 cm x 80 cm. A lot of bolts of jersey are 160 cm wide which is the size I cut. If your armspan is a lot wider than 160 cm you may need to cut your fabric differently.

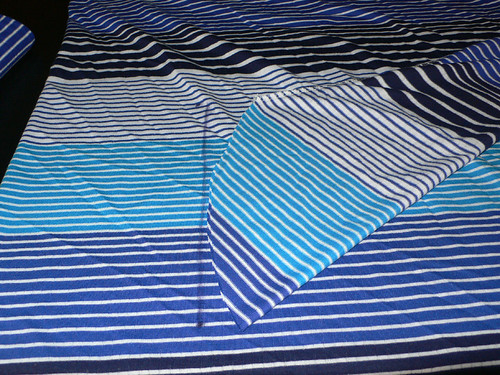
2. Find a long sleeved knit jersey top that fits you nicely in the arms. Trace this onto your fabric along a fold such that you will only have one seam on each sleeve. Remember to leave a seam allowance. The first sleeve I cut was a little tight as the stretch in the fabric I was using wasn't as 'stretchy' as the sleeve I used as a template, so I would recommend trying the sleeve for size before cutting a second one. Sew the arm seam shut, leaving the cuff raw.


3. Trace and cut a slit in your fabric about 14 cm from the top edge and approximately as long as the opening in your sleeve. This will be where you will set the sleeve into the main fabric. I didn't worry about shaping the slit to the arm sleeve opening at all as the stretch of the knit was enough to accommodate the small difference. If you don't have a serger you will have to use a zig zag stitch for this part I suppose. If you do have a serger, take care to start at the armpit and sew your way around to avoid any accidental mangled cutting when turning the corner of the armpit. For the top of the shoulder I just ignored the top of the slit and curved around it with the serger as well as I could and it worked without a problem. Also take care to note which is the 'right side' and make sure you turn your sleeve right side out before setting the sleeve in to pin and sew.

That's all. I hope it all made sense. It is a pretty simple thing to make but that doesn't mean I explained it in the simplest way.

Salut!

22.4.10

Anna Maria Flannels for Baby


I had some lovely lovely Anna Maria Horner flannel sitting around which i didn't know what to do with as i thought about making some pajama pants for my little one but didn't want to 'waste' flannel in Queensland.

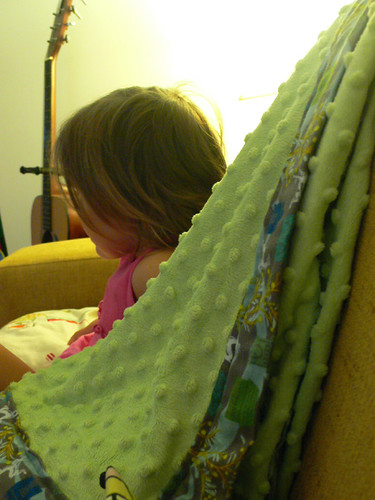
Luckily i felt like practicing some rolled edges with my new man Sergio and had some minkie fleece waiting around to be edged with something. . .

The flannels are so soft! i think they will be the sweetest little washers for our new little guy. It's nice to have some special things that aren't just hand me downs, don't you think?

20.4.10

Thrift Shop Finds


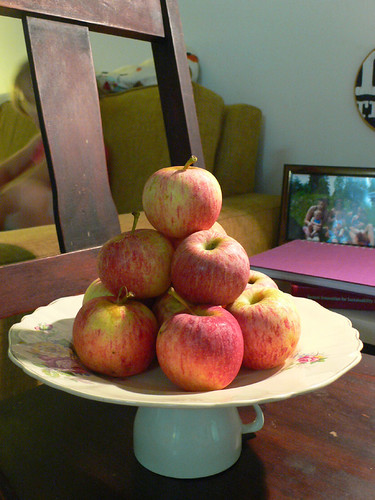
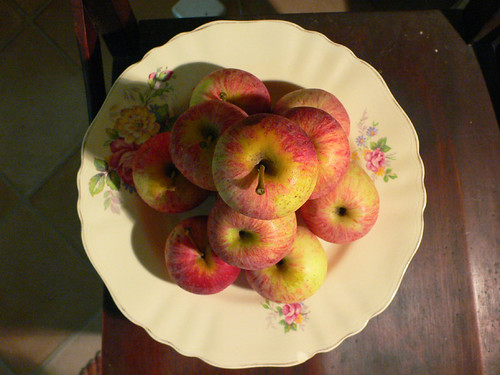
I've made some nice thrift shop finds lately. This chair, which will be eventually re-finished in some fashion, and a cute plate and tea-cup which i super-glued together to fashion a little cake platter of sorts. I've seen a few lately in craft blog land including a 2 tiered version and think it is a cute idea. An alternate base could be an inverted wine goblet.

In other news, i have recently acquired a serger (overlocker)! It is a Husqvarna Viking Huskylock 910. It is quite a manly machine, his name is Sergio. I'm super excited about it and it is taking up a lot of my spare time, as I have been so busy playing with it that any blog updates have taken a serious backseat. So the long and short of it is I have a big backlog of things i'd like to blog about that have been made by Sergio, but can't bring myself to sacrifice precious time with him for posting about it. I think i might have to do a largish serger project related post soon.

OK, I'm off to do some rolled edge Anna Marie Horner flannel washers and burp cloths!

16.4.10

I could really spend some time. . .

. . . fiddling around with these two sites, Spoonflower and Zazzle. Seems there is a bit of a Zazzle epidemic in the blog world at the moment - who wouldn't want to design their own sneakers? I know i wasted a good 45 minutes today messing around with colour ways.

As for Spoonflower, it's been around for awhile i guess but i've never paid much attention to it. However, with the newly made purchase of a whizbang overlocker (ahem, Husqvarna Huskylock 910 - more on that later) I am finding a new penchant for jersey knits and dismay at how hard it seems to find any nice prints around. Other great thing about Spoonflower is they have organic cottons available, which is super duper. Constant battle I have within is the fact that i like to make things therefore I am consuming albeit not in the typical manner - trying to salvage fabric second hand and finding ethical fabrics is really the go so I can still feel good about making more 'stuff'.

Anyway, below are some fabrics found on Spoonflower today that I am coveting. They are embedded from the site so ignore (but heed if you like the designer's work and want to see more) the designers name printed across the images. . .


Woodland Cutout (Brown & Pink)


Woodland


Tetris Border Print


Weird Fishes


Orchard repeat

i'm sure there are millions of prints i could love on there. They are a bit pricey (starting at $18 per meter) but for custom organic prints that isn't much. Plus I am finding if I use a 'better' fabric i am less likely to be sloppy and finish my projects with a lot more care.

what fabric have you seen lately to inspire you?

12.4.10

mini quilts


my favourite mini quilts.

for sources see whip up's mini quilt month. . .

7.4.10

reused t-shirts


Projects involving reusing t-shirts have been catching my eye lately. Brett actually did the i heart tree frame of his own volition (being a bit crafty he was!). i found the embroidery hoop above the books at an op-shop and added a bit of old fabric from a t-shirt a la soulemama.

a few more reused t-shirt ideas. . .

Bean Bag Chair (CRAFT)

Baby Tights (Made By Rae)

Toddler fold-over Yoga Pants
(Samster Mommy) note: uses old adult pants, but could be done with any jersey clothing item

Grocery Bag (Between the Lines)

Extended Kids T-shirt modification (Dabbled)

3.4.10

little stitches


I've been busy lately making tiny stitches. My first even cardigan! Its a teeny tiny one, so it wasn't too daunting. I must say I am a little enthralled with the raglan sleeve shaping if i do say so myself. It isn't perfect, but as it was without a pattern I feel pretty pleased with the results.


As you can see the button hole side is a little shorter than what will be the side with buttons. Why? Probably because I am not a diligent stitch counter and therefore picked up more stitches when doing the front placket ribbing on one side than the other. Oops! Never mind. Gives it that handmade 'look' right? Must sew on the buttons, maybe today.


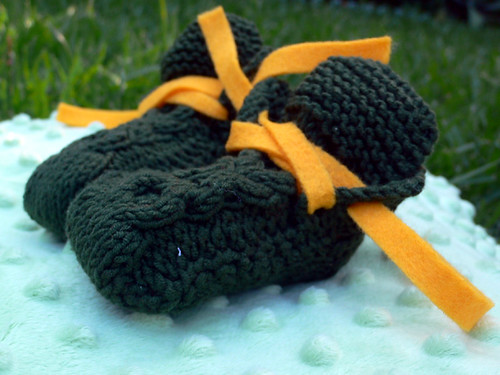
Other little bit of knitting above, completed a while ago but i had trouble figuring out what to lace these little booties with. Settled on golden yellow felt. The booties are made with cotton so as to be relatively cool and made using my own half-hazard pattern once again. The cabled top of the boot is an XOXO cable, which doesn't really show in the photo but is cute in real life.
The booties are perched on a piece of super duper soft 'minkie' fleece - plans are underway for a sort of pram blankie with pretty border. New little baby will have some hopefully cute things to be swaddled in if i can get it all done in the next few weeks. . .

In other news, i noticed today that there is a new follower on this blog which is a pretty big event around here as I am not the sort of blog to get 'random' followers. Anyways, I clicked on the link to her blog and imagine my surprise when i found she had just posted about one of my previous posts! Weird! In a good way. Thanks for linking to me Ali Foster, whoever you are! You should visit her, she has a very pretty blog.

Well, I'm off to do some floor moping and scavenger hunt map making.

29.3.10

multi-crafting


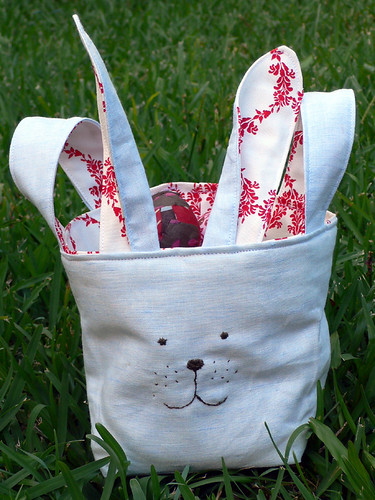
this bunny basket has tickled the fancy of others as well, as seen here, here and here. how can you blame us? they are sooo super cute! and not so Easter-y that you can't envisage them sitting around the traps year round. obviously if you omit the ears and bunny face embroidery, you've got yourself a perfectly adorable tote type basket.

i made the one above as a birthday gift for one of Bea's friends. complete with food colouring dye play silks and fabric covered eggs. actually, Bea helped with the activity of covering the eggs with fabric strips, which was kind of our first major foray into 'real' crafts at home and i was very excited that she loved doing it so much.

kokka and echino. . .


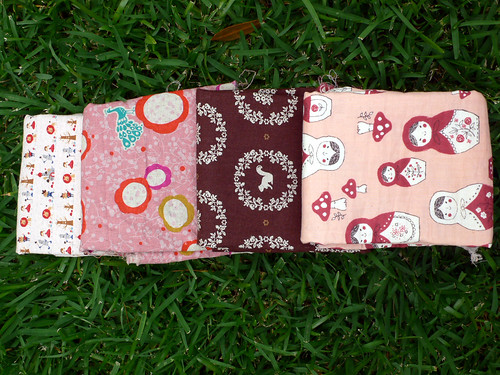
OK, here they are - the 4 half meter pieces of fabric that have had me tossing and turning at night. Seriously, what am i going to do with these beauties? I am not a regular user of 'good' fabric so i am a little daunted. I actually washed them today, in preparation for sewing. i know all proper sewers wash their fabric, but i'm not really a proper sewer so this is probably a first for me (except for the time i made a quilt).

julie called me to let me know about a 30% off sale of quilting fabric at a local shop that stocks Kokka and Echino fabrics. If you've never heard of them they are imported from japan and a 50 % linen/cotton blend.

Bea actually picked them out, except for the brown (which she approved of after some thought). Surprisingly she didn't choose the pinkest things (well, they are pretty pink but don't have ballerinas on them or anything) and even picked out the wizard of oz print on the far left. She felt they were 'hers' and carried the little packet of fabric around quite proudly. We arrived home and she took them out and spread them on the table happily chatting to herself about making some skirts. I went outside at this point to get everything else out of the car and had a passing flash of an image of her actually making something out of the precious kokka. Came back inside to see her posed with scissors ready to cut into this $30 per meter crisp cotton/linen. Time stood still. I ran in slow motion, half yelling half moaning 'NNNNOOOOOOOOOOOO!'

Pretty funny huh?

She didn't cut into the fabric at all, but has been hounding me daily about 'her' fabric being 'ready'. As in ready for her to cut? i'm not sure. but i have carefully kept it out of sight just in case. . .

23.3.10

Embellish

There seems to be a bit of an embellished t-shirt craze going on at the moment and i'm thinking this would be an easy thing to acheive at home, with my sewing machine and a pair of scissors. Especially as I'm looking forward to ending a wardrobe dry-spell of pregnancy limited clothing (probably have about 5 things i can actually put on my 8 months pregnant body at the moment). So. I am looking forward to wearing some other clothes soon. Added to the excitment is the fact that we are coming into autumn/winter here, so I can wear jeans possibly and t-shirts instead of tank-tops at all times. And, I'm pleased to be thinking about re-fitting some old t-shirts i have that i may be able to give new life to.
Anthropologie. All of a sudden all the american bloggers are talking about anthropologie. Never heard of it until maybe yesterday? but after a quick look at their online shop i may be browsing it again for future inspiration. Not really for shopping, as it is a bit pricey for my likes, but plenty of nice colours and ideas for things that 'one' might possibly be able to mimic at a lower price-tag.

I like these ones. . .


Also saw some good ideas for dealing with stained or bleach damaged t-shirts, via Elsie Marley


Cool, huh?

17.3.10

a tisket, a basket

hi! wow i almost felt like i couldn't remember what it is to write a post anymore, it has been a while! having company certainly cut into my crafting/blogging time but the upside is that i have a gazillion little projects on the brain and will be on maternity leave soon . . . although this doesn't necessarily equate to having more time at least once the new one is born! but for the month that I am just waiting around twiddling my thumbs i will be doing lots of stuff i hope.

on friday me and 2 other crafty mama types (blogs here and here) are getting together to make some crocheted baskets out of t-shirts. the one below was inspired by one spied on Etsy and i was forced to retrieve my rusty crochet hooks and start hooking. it was a satisfying project because i feel like it only took a few minutes (well the cutting of the t-shirts took awhile, but we won't count that). next basket will include a cute handle to make it more Easter-y.


i am kind of excited about Easter this year because i used to LOVE doing scavenger hunts when we were little, and i think Bea is old enough to do a little chocolate egg hunting. and although i'm not a hallmark holiday kinda girl, i like eggs and bunnies and chocolate, plus there are quite a lot of crafty things one might accomplish involving all of the above. I'd like to do this, this and this especially, as it is the cutest basket I have ever seen!. Baskets are so useful don't you think? We are going though some massive reorganization at ours, and I am thinking many baskets are going to be pivotal in getting the job done. Plus little Bea so loves putting bits and pieces into baskets and containers of sorts.

Back to scavenger hunting though - I am thinking maybe taking photos of the house and marking spots she might find a treasure, as she is probably a little young to figure out schematic drawings. My mum used to write these amazing rhyming couplets sort of riddles for us to puzzle over before the answer revealed the hiding spots, but i don't think Bea is ready for riddle-ry yet.

What kind of Easter activities do you do?

4.3.10

Leslie's Gas Oven Yogurt

For all you potential yogurt makers who don't have a yogurt maker, and who live somewhere cold where it can be hard to maintain a warm enough temp for your bacterial culture here is a nice post for you. This will also be a good option for the downunder winter (we don't have indoor heating and things can be a bit chilly).

This post was all exciting for me because it was written by a GUEST! Her name is Leslie, and she was my friend in high school. I don't think I have actually seen her since then, but luckily for facebook she piped up and said 'hey i make yogurt too! but in my oven'. i thought it might be fun to have someone else post something on my blog, and to learn about another way of making yogurt. . .

So, without further ado, see below for Leslie's Gas Oven Yogurt (although i am assuming you could also use an electric oven as long as you can get it to the right temperature. . .)

Thanks Leslie!


You will need. . .


  • a large pot/sauce pan

  • 1 gallon of milk (you can use any kind of milk depending on the fat content you desire- I use whole milk/Homo for yogurt)

  • a whisk

  • a thermometer (I use a hot drink thermometer ie. for latte making)

  • 3tbs of a good plain yogurt with live bacterial cultures

  • metal spoon for mixing

  • gas oven or an electric heating pad/blanket.


STEP 1:


  • Fill your large pot with some water and bring to a boil (this ensures that your pot is clean). Once it has come to a boil you can dump out the water.

  • Pre heat your oven to 150 fahrenheit or as low as it can go.


STEP 2:


  • Pour your milk into the clean pot and place it on your stove at a medium/high heat.

  • Keep a close eye on it and whisk often to avoid any milk burning to the bottom of the pot.

  • You will need to keep track of the temperature using your thermometer. The goal is to scald the milk and get it to 180 degrees fahrenheit. When its almost at 180 it will start to froth.


STEP 3:


  • Once it has reached 180 fahrenheit remove the pot from the stove and submerge it in a sink full of cool water

  • You now want the milk to drop to 110 fahrenheit. Continue whisking till it reaches 110.


STEP 4:


  • Once the milk is at 110 fahrenheit add the 3 Tbs. (aprox. its Ok to add more) of yogurt directly into the milk.

  • Whisk in the yogurt so that it is nicely mixed with the milk


STEP 5:


  • Place the pot in the middle of the oven and cover with a lid ( the lid should not be too tight- I use a clay baking sheet placed on top of the pot) (note: I'm guessing this is because you don't want condensation to form and drip into the yogurt, making it more watery? -Hsu-Yin).

  • If you cant get your oven temperature under 120, then try propping the door slightly open.

  • The Heating Blanket method requires you to place your pot on to a heating pad on high heat and cover it with a clean dish towel.


STEP 6:


  • Set your timer for 7hrs and head off to work,school or go do what ever you do.


STEP 7:


  • Take the pot out of the oven and stir up the yogurt. It should be starting to look like yogurt at this point and should have firmed up a bit. You should also see a watery film on top (this is good).

  • Mix it all up till it looks smooth


STEP 8:


  • Pour the yogurt into some containers ( I use glass mason jars, and old yogurt containers- make sure they are very clean first).


STEP 9:


  • Place the containers in the coldest part of your fridge over night.


STEP 10:


  • Add your flavourings of choice - honey, jam, vanilla, stewed fruit etc, or leave plain. We like ours with peanut butter! (sorry leslie, i lost that last bit about your preferred toppings in an editing error!)