Showing posts with label frugal. Show all posts

20.9.10

peppermint tooth scrub

IMG_1544

i've been loving making things from scratch lately. last week i found an idea for homemade toothpaste and decided to give it a try. after further research, discovered using baking soda daily on teeth may not be a good idea due to abrasion of the enamel, but boy are my teeth feeling clean since using a couple doses of this simple, scrubby, minty paste. i love it. tartar begone. i am going to try and restrain my use to bi-monthly.

2 T glycerin
1 T xylitol (available from sweetener section of healthfood stores, it is a natural fluoride-like substance)
1/2 tsp salt
3 T baking soda
1/4 tsp peppermint extract

mix all ingredients until well incorporated. you may have to add a little more glycerin or a little more baking soda depending on how you want the consistency. mine turned out a little less pasty than normal toothpaste.

my efforts towards making toothpaste aren't over. i've been reading about safer abrasives to use, and i haven't read anything conclusive as of yet.

happy scrubbing!

10.9.10

5 things i will never (never?!) buy again


image via flickr


last week one of my favourite bloggers, rhonda jean over at Down to Earth wrote a post about the 5 things she would never buy again.

i could not get this topic out of my head. five things i will NEVER buy again? never is a long time. never is forever. and what is the point, besides saving money/consuming less/being green etc? i've been thinking a lot recently about how to opt out of our disfunctional economic system in small ways, and i think this is one of them.


so, without further ado, here are the 5 things i will never buy again.


1. paper napkins. i've never been a big napkin user and have never bought paper napkins for personal use before. but then i started thinking, what about kids birthday parties? then what? i think in the past i have (ahem) 'borrowed' paper napkins from my mother in law for said birthday parties. this year i am seriously making a large number of fabric napkins. i am not joking. watch me.

another point about napkin use. what about using paper napkins? i may use them at restaurants but shall not use them excessively.

2. pizza bases. again, never been big on buying pizza bases, so i think it's safe to say that i will not in the future. they are way too easy to make and way too tasty.

3. deodorant after a recent foray into making my own

4. commercial cleaning products. all baking soda and vinegar from here on in.

5. factory farm eggs. hmm. i am hoping i can fulfill this fifth thing. could there be a moment in my future where i am so desperate for eggs that i will buy anything less than free-range or organic? possibly. but i don't see it as likely, so here is my fifth. factory farm eggs.

i suppose there are plenty of things i will never buy again because i have never bought them before, but those things don't count. i'm thinking that things i am consciously choosing not to buy are the only things that count. i am hoping to add to this list. currently i am on a no clothes diet. no store bought clothes, although i can buy second hand. i'd like to try to make all my clothes this year, excluding underwear, hosiery and shoes for now.

there are lots of things i hope never to buy again and will be trying hard not to buy again. canned beans and baby wipes are definitely on my radar at the moment, but i'm not ready to say never quite yet.

i think i would like this list to a habit, a sort of bi-annual vow. maybe even a quarterly. 2o things per year i will never buy again.

what things will you never buy again?

30.8.10

homemade deodourant

image from here

we've been off the commercial deodorant/antiperspirant bandwagon for a while now, as the knowledge that standard brands include aluminum, pthalates and fragrances linked to neurological problems (including Alzheimer's), cancers and reproductive toxicity (see this cosmetic safety database). plus those roll up roll on spray on type bottles contain a lot of unnecessary plastic packaging.

we've both been using the salt crystal type deodorant which neutralizes odour causing bacteria. it generally works, however lately it has been heating up here in Queensland as winter comes to an end and i'm not always getting a shower every day (due to baby and 3 year old intervening in my ability to tend self) and i was finding the salt crystal was just not neutralizing those odour causing bacteria enough for me.

happened to read this post over at soozs and she mentioned making her own deodorant and that it really really worked (i, like others it seems, find the 'natural' brands just didn't cut it) and it piqued my interest. so i found my way to the original source and made some of my own. i must say, i am very impressed thus far! no smelliness after full two days with no re application. wow. that seems better than store bought. also although it turns out as a white paste it doesn't leave actually white marks on clothes as long as it is rubbed in properly.

here is what i ended up adding, slightly different from the original recipe and slightly different from the sew green recipe it is based on.

1/8 cup cornstarch
1/8 cup arrowroot flour
1/4 cup baking soda
5-6 tablespoons of coconut oil
some essential oil for scent
enough witch hazel to make mixture into a paste

then mixed to form a paste. i wanted a really pasty paste (ie like normal deodorant but a bit softer so it would be easy to rub into skin) so i ended up adding the witch hazel to moisten it a bit further.

i'm more motivated to try more home made cosmetics now. i've never been a bit fan of shampoo, i use it as little as possible, so that might be the next item to try.

23.8.10

fish

we've been mildly obsessed with fishing around our place. B is into play games about it and i've been fantasizing about catching our own fish from the shore for a while now.

this weekend it all came to fruition.

all except for the 'catching' the fish part.


IMG_1132


finished magnetic fishing game. its a pretty big hit.

more magnetic fishing games here and here


IMG_1112

'ted the head'.

he was my secondhand fishing rod dealer. he straps a multitude of rods and reels onto his triumph and peddles them at the chandler markets on sundays.

IMG_1114

IMG_1116

fish and chips at the esplanade yesterday afternoon.

not caught by me.


IMG_1117

me, on my maiden cast off the jetty.


i didn't catch anything! can you believe it? i had the right bait, waited til the tide was coming in and had it on good authority that it was going to be a good evening for fishing, but it got so dark and cold and my baby was coughing up his poor little lungs. and i didn't know that you should hide the hook. i swear i could feel them biting and at one point i sweat i had something big on my hook but it got away.

i will be catching fish in the near future though, and i will let you know when that happens.

22.4.10

Anna Maria Flannels for Baby


I had some lovely lovely Anna Maria Horner flannel sitting around which i didn't know what to do with as i thought about making some pajama pants for my little one but didn't want to 'waste' flannel in Queensland.

Luckily i felt like practicing some rolled edges with my new man Sergio and had some minkie fleece waiting around to be edged with something. . .

The flannels are so soft! i think they will be the sweetest little washers for our new little guy. It's nice to have some special things that aren't just hand me downs, don't you think?

20.4.10

Thrift Shop Finds


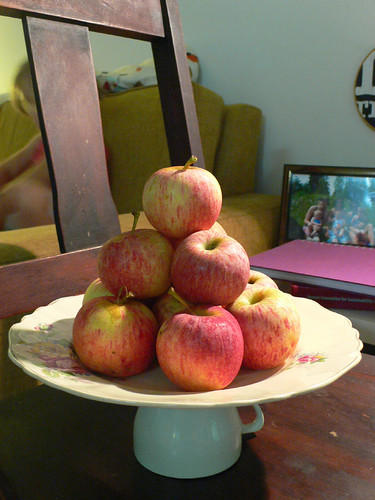
I've made some nice thrift shop finds lately. This chair, which will be eventually re-finished in some fashion, and a cute plate and tea-cup which i super-glued together to fashion a little cake platter of sorts. I've seen a few lately in craft blog land including a 2 tiered version and think it is a cute idea. An alternate base could be an inverted wine goblet.

In other news, i have recently acquired a serger (overlocker)! It is a Husqvarna Viking Huskylock 910. It is quite a manly machine, his name is Sergio. I'm super excited about it and it is taking up a lot of my spare time, as I have been so busy playing with it that any blog updates have taken a serious backseat. So the long and short of it is I have a big backlog of things i'd like to blog about that have been made by Sergio, but can't bring myself to sacrifice precious time with him for posting about it. I think i might have to do a largish serger project related post soon.

OK, I'm off to do some rolled edge Anna Marie Horner flannel washers and burp cloths!

4.3.10

Leslie's Gas Oven Yogurt

For all you potential yogurt makers who don't have a yogurt maker, and who live somewhere cold where it can be hard to maintain a warm enough temp for your bacterial culture here is a nice post for you. This will also be a good option for the downunder winter (we don't have indoor heating and things can be a bit chilly).

This post was all exciting for me because it was written by a GUEST! Her name is Leslie, and she was my friend in high school. I don't think I have actually seen her since then, but luckily for facebook she piped up and said 'hey i make yogurt too! but in my oven'. i thought it might be fun to have someone else post something on my blog, and to learn about another way of making yogurt. . .

So, without further ado, see below for Leslie's Gas Oven Yogurt (although i am assuming you could also use an electric oven as long as you can get it to the right temperature. . .)

Thanks Leslie!


You will need. . .


  • a large pot/sauce pan

  • 1 gallon of milk (you can use any kind of milk depending on the fat content you desire- I use whole milk/Homo for yogurt)

  • a whisk

  • a thermometer (I use a hot drink thermometer ie. for latte making)

  • 3tbs of a good plain yogurt with live bacterial cultures

  • metal spoon for mixing

  • gas oven or an electric heating pad/blanket.


STEP 1:


  • Fill your large pot with some water and bring to a boil (this ensures that your pot is clean). Once it has come to a boil you can dump out the water.

  • Pre heat your oven to 150 fahrenheit or as low as it can go.


STEP 2:


  • Pour your milk into the clean pot and place it on your stove at a medium/high heat.

  • Keep a close eye on it and whisk often to avoid any milk burning to the bottom of the pot.

  • You will need to keep track of the temperature using your thermometer. The goal is to scald the milk and get it to 180 degrees fahrenheit. When its almost at 180 it will start to froth.


STEP 3:


  • Once it has reached 180 fahrenheit remove the pot from the stove and submerge it in a sink full of cool water

  • You now want the milk to drop to 110 fahrenheit. Continue whisking till it reaches 110.


STEP 4:


  • Once the milk is at 110 fahrenheit add the 3 Tbs. (aprox. its Ok to add more) of yogurt directly into the milk.

  • Whisk in the yogurt so that it is nicely mixed with the milk


STEP 5:


  • Place the pot in the middle of the oven and cover with a lid ( the lid should not be too tight- I use a clay baking sheet placed on top of the pot) (note: I'm guessing this is because you don't want condensation to form and drip into the yogurt, making it more watery? -Hsu-Yin).

  • If you cant get your oven temperature under 120, then try propping the door slightly open.

  • The Heating Blanket method requires you to place your pot on to a heating pad on high heat and cover it with a clean dish towel.


STEP 6:


  • Set your timer for 7hrs and head off to work,school or go do what ever you do.


STEP 7:


  • Take the pot out of the oven and stir up the yogurt. It should be starting to look like yogurt at this point and should have firmed up a bit. You should also see a watery film on top (this is good).

  • Mix it all up till it looks smooth


STEP 8:


  • Pour the yogurt into some containers ( I use glass mason jars, and old yogurt containers- make sure they are very clean first).


STEP 9:


  • Place the containers in the coldest part of your fridge over night.


STEP 10:


  • Add your flavourings of choice - honey, jam, vanilla, stewed fruit etc, or leave plain. We like ours with peanut butter! (sorry leslie, i lost that last bit about your preferred toppings in an editing error!)

17.2.10

Making Yogurt is Easy, Yo!

I've been making yogurt with success for quite some time and now that i'm good at it, it is just like making a pot of coffee, or something just as routine.

In principle, making yogurt involves giving a 'good' bacteria culture the ideal habitat in which to breed. In this case, they are a little colony of lactobacillus whose babies like warm milk. What baby doesn't like warm milk? So theoretically, infusing warm milk with bacteria colonies and maintaining an ideal breeding temperature for the little critters is pretty simple.

I used to make yogurt in a tupperware and then keep in in an esky/cooler packed with bottles of hot water to maintain the temp. I was finding that the results were a little irratic, depending on how diligently i was maintaining the temperature. There are lots of variations on the internet, using ovens, crockpots, piles of blankets etc.

I was originally turned off by the 'Easiyo' yogurt maker because it is actually meant to be used with prepackaged powder mixtures containing the bacterial culture and powdered milk - however these are not as cheap as just buying your own milk and reserving a little yogurt from a previous batch as a starter culture. Anyway, i invested $20 on an Easiyo yogurt maker a month or so ago - it maintains the idea temperature really well, and now that i know i can easily make yogurt without the Easiyo packets, i haven't looked back! Wow i sort of sound like an Easiyo info-mercial (except on the website they highly DO NOT recommend using milk in a DIY fashion, claiming you cannot guarantee product safety or something).

I've also read that your 'home' culture takes on a little identity of its own and is somehow better for you, but i haven't confirmed that scientifically. I do notice that if i accidentally don't save any yogurt for my next batch and have to buy a pot of yogurt it takes a few batches for the flavour to mellow. Usually the first few have quite a sharp sour flavour in comparison to yogurt made with the following 'generations' of starters.


After a day or so in the fridge i find the yogurt gets even tastier and thicker - we use it now instead of sour cream and sometimes i let it strain for a really long time and then add salt to make a kind of 'cream cheese' (quark). The best thing i think about making yogurt at home is that bea really loves it and is finally eating mainly unsweetened yogurt, which she's never liked before. . .
You really don't have to use an Easiyo maker for this 'recipe' (but you can order them online just google Easiyo). i think a really good substitute would be a thermos, cooler or 'esky' and jars or containers inside that contain the milk and culture. Then you can just add hot water straight into your cooler. I guess the problem with this might be finding a small enough cooler so you aren't filling your kettle a bunch of times to get the level high enough that it immerses the jar.

16.2.10

beetroot blush


I don't really wear 'blush', but this recipe for beetroot blush/lipgloss looks fun to make and fun to use. . .